

Since my last guide about Angular models was written in September 2017 it's definitely time for an update for the most recent version of Angular. Some things have changed regarding the implementation especially in terms of how to create our classes (which is now done via Angular CLI), how the HttpClient works (which has become generic) and how to map our response to our model (via pipes).
Additionally this guide will try to cover some of the questions which came up in the last guide.
For the TL;DR version of this post see the GitHub repository.
Server
For this guide we'll create a very small expressjs server which will serve our data. This server (implemented in plain JavaScript) will return simple JSON which will then be mapped to our models in Angular.
// server.js

// Our users which will be queried by their index
const users = [
  {
    firstName: "Jesse",
    lastName: "Pinkman",
    position: "Manufacturer",
    cars: [
      {
        brand: "BMW",
        model: "M3",
        kW: 338,
      },
    ],
  },
  {
    firstName: "Walter",
    lastName: "White",
    position: "CEO",
    cars: [
      {
        brand: "BMW",
        model: "335i",
        kW: 225,
      },
      {
        brand: "Lamborghini",
        model: "Aventador",
        kW: 566,
      }
    ],
  },
];

// Allow cross-origin requests
app.use(function(req, res, next) {
  res.header("Access-Control-Allow-Origin", "*");
  res.header("Access-Control-Allow-Headers", "Origin, X-Requested-With, Content-Type, Accept");
  next();
});

app.get("/users", (req, res) => {
  return res.json(users);
});

app.get("/user/:id", (req, res) => {
  // To prevent the ID "0" we'll simply subtract by one. This way we can query for id = 2 which will serve us 1, etc.
  const idx = req.params.id - 1;

  if (!users[idx]) {
    return res.status(404).json({ error: "User not found" });
  }

  return res.json(users[idx]);
});

app.listen(3000, () => {
  console.log("Server running on port 3000");
});
The server is started with node server.js and will provide the API to query two different users based on their ID. For example http://localhost:3000/2 will output:
{
  "firstName": "Walter",
  "lastName": "White",
  "position": "CEO",
  "cars": [
    {
      "brand": "BMW",
      "model": "335i",
      "kW": 225
    },
    {
      "brand": "Lamborghini",
      "model": "Aventador",
      "kW": 566
    }
  ]
}
Heading over to http://localhost:3000/users will return a list of all users.
We've got two objects here which will be mapped to proper model objects; the user itself and its cars (plural!).
Angular application
Let's start at the very bottom with creating a new Angular application with the Angular CLI:
ng g angular7-models
cd angular7-models
We're going to need a service which is responsible for our user and two models, one for representing a user and one for representing a car.
ng g service services/user
ng g class models/user.model
ng g class models/car.model
This (and the already existing app component) is the foundation for all the things we're going to need for this guide.
Models and deserialization
All our models need to be deserialized when queried from our API. This simply specifies the way the data from our API is mapped into our model classes.
As in the previous guide we'll simply implement a Deserializable interface which will be implemented by our models afterwards:
// src/app/models/deserializable.model.ts

export interface Deserializable {
  deserialize(input: any): this;
}
This interface will be implemented by our models; deserialize will take care of mapping our data to our object.
The car model
Since our car model doesn't have any relations (which makes it the easier model to implement) let's start with this model.
// src/app/models/car.model.ts

import {Deserializable} from './deserializable.model';

export class Car implements Deserializable {
  public brand: 'BMW' | 'Audi' | 'Lamborghini' | 'Mercedes';
  public model: string;
  public kW: number;

  deserialize(input: any): this {
    return Object.assign(this, input);
  }

  getHp() {
    return this.kW * 1.36;
  }
}
Object.assign in this case is a simple helper which assigns our input to our object - and since we don't need any assigment logic (like transforming or modifying data from our API) this is totally sufficient.
Additionally for demonstration purposes this model has a utility method which converts the kilowatts of our car to horse power - we'll use this utility later in our UI.
The user model
Our user model is going to have a relation with our car model; one user can have many cars. This requires our deserialization in the user model to additionally take care of deserializing our cars;
// src/app/models/user.model.ts

import {Deserializable} from './deserializable.model';
import {Car} from './car.model';

export class User implements Deserializable {
  public id: number;
  public firstName: string;
  public lastName: string;
  public position: string;
  public cars: Car[];

  deserialize(input: any): this {
    // Assign input to our object BEFORE deserialize our cars to prevent already deserialized cars from being overwritten.
    Object.assign(this, input);

    // Iterate over all cars for our user and map them to a proper `Car` model
    this.cars = input.cars.map(car => new Car().deserialize(car));

    return this;
  }

  getFullName() {
    return this.firstName + ' ' + this.lastName;
  }
}
This deserialization method works slighty different than the one of our car; we need to deserialize our cars after assigning our input to the user model to prevent the input from overwriting our cars property.
Since we know that input.cars is an array we are utilising Array.prototype.map(). This iterates over all our elements (in our case: our cars), deserializes them and returns an array with our deserialized models.
Note: In case you're wondering if you could use
Array.prototype.forEach(): No! The big difference betweenforEachandmapis thatmapreturns a new array whileforEachjust applies the provided callback to all our array items - but don't return a new array.
Again we've implemented a utility method to directly get the full name of the user.
That's it for our models. Let's query them via our service!
User service
One major change since my last guide is the way the HttpClient works. It's has become generic which simply means we can tell it what type we're expecting in our response.
// src/app/services/user.service.ts

import {Injectable} from '@angular/core';
import {HttpClient} from '@angular/common/http';
import {Observable} from 'rxjs';
import {User} from '../models/user.model';
import {map} from 'rxjs/operators';

@Injectable({
  providedIn: 'root'
})
export class UserService {

  constructor(private httpService: HttpClient) {
  }

  public getUser(id: number): Observable<User> {
    return this.httpService.get<User>(`http://localhost:3000/user/${id}`).pipe(
      map(data => new User().deserialize(data)),
      catchError(() => throwError('User not found'))
    );
  }

  public getAllUsers(): Observable<User[]> {
    return this.httpService.get<User[]>(`http://localhost:3000/users`).pipe(
      map(data => data.map(data => new User().deserialize(data)))
    );
  }
}
We've got two methods here: one for querying a specific user and one for querying all users.
Both methods map their response to our models via the map pipe from RxJS. Our getUser method additionally implements some error handling which will be useful when trying to query a non existing user.
That's it for our service. We can now utilise our models via our service!
App component
Our app component will have two very simple features: query a specific user (which makes use of the getUser service method) and query all users (which makes use of the getAllUsers service method). For the sake of simplicity we're going to put the logic for both functions into one single component.
Let's start with our template:
<!-- src/app/app.component.html -->

<div style="width: 400px; margin: auto;">
  <h2>Angular 7 model showcase</h2>
  <input type="number" [(ngModel)]="userId" placeholder="User ID">
  <button type="button" (click)="getUser()">Get user</button>

  <button type="button" (click)="getAllUsers()">Get all users</button>

  <div *ngIf="user">
    User is called {{user.getFullName()}}. He has the following cars:
    <ul>
      <li *ngFor="let car of user.cars">
        {{car.brand}} {{car.model}} with {{car.getHp()}} hp.
      </li>
    </ul>
  </div>

  <div *ngIf="users">
    <hr>

    <ul>
      <li *ngFor="let user of users;">
        {{user.getFullName()}} is {{user.position}} and has {{user.cars.length}} cars
      </li>
    </ul>
  </div>
</div>
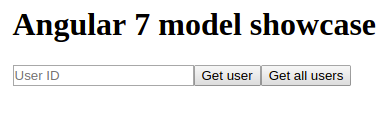
This will lead us to this really beautiful UI:
Before it's fully working we need to implement the click events attached to our buttons;
import {Component} from '@angular/core';
import {UserService} from './services/user.service';
import {User} from './models/user.model';

@Component({
  selector: 'app-root',
  templateUrl: './app.component.html',
  styleUrls: ['./app.component.css']
})
export class AppComponent {
  public userId: number;

  public user: User;

  public users: User[];

  constructor(private userService: UserService) {
  }

  public getUser() {
    this.userService.getUser(this.userId).subscribe(user => this.user = user);
  }

  public getAllUsers() {
    this.userService.getAllUsers().subscribe(users => this.users = users);
  }
}
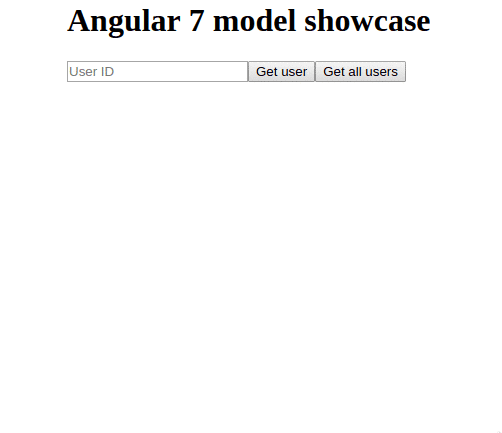
And, et voilà, we're done:
Be amazed by this insane kW to HP conversion from our getHp method because I've forgotten to round!
All the user interactions within our template are now an instance of our User object (and every users cars are an instance of Car) - meaning we could use all the helper utilities and work with real objects.
Conclusion
Handling real objects instead of raw JSON makes your life a lot easier (see my previous guide about advantages of this approach).
As always you can find the entire source code for this guide on GitHub.